ON THIS PAGE
You've opened a PDF assignment, contract, or floor plan, and you need to circle something before sending it back. To draw on a PDF, open it in a browser-based editor, select the pen or shape tool, make your marks, and save the annotated document. Choose the right tool for each mark so your feedback stays clear and, where supported, editable.
Table of Contents
- Open Your File in the PDFKing Editor
- Get to Know the Drawing Toolbar
- Adjust Pen Size, Color, and Opacity
- Real Workflows for Drawing on a PDF
- When Drawing Is Not Redaction
- Drawing on PDFs From a Phone or Tablet
- Saving, Verifying, and Frequently Asked Questions
Open Your File in the PDFKing Editor
You can annotate a PDF without downloading software or creating an account. The browser-based editor gives you a place to add drawings, arrows, shapes, and text while keeping the document's layout as your reference.
Start with a copy of your file, especially if it's a signed contract, graded assignment, or document you need to preserve. If it arrived through email or cloud storage, download it to your device first rather than assuming the editor connects directly to that service.
1. Load the Document and Find Your Page
- Open Edit PDF. Select the editing tool from the toolkit.
- Choose your file. Use the file-selection control to find the downloaded PDF. If a drag-and-drop area appears, you can drop the file there instead.
- Locate the page. Check the document preview before choosing a drawing tool. Make sure you're marking the intended page and that its orientation is correct.
Main image title: Mark Up Your PDF Without Printing It. Image description: A browser editing workspace showing where to begin adding clear page annotations.
Look for the drawing and annotation controls near the document workspace. Button labels and placement can change, so identify the pen, shapes, and text controls by their names or icons before clicking.
For broader changes, the guide to editing a PDF document helps distinguish page markup from other editing tasks.
Before you draw: Confirm the file's privacy requirements. Browser-based operation alone doesn't establish whether a tool processes every file locally.
If you're reviewing a property layout, the Pinnacle Property Media floor plan guide offers related background to consult alongside the plan. Keep your proposed changes clearly separate from the drawing's original labels.
Get to Know the Drawing Toolbar
A pen, arrow, and text box may all look like ways to add something to a page. They serve different purposes, though, and their underlying PDF annotation types help explain the difference.
The PDF specification treats an annotation as an object associated with a page location or user interaction, with categories including markup and geometric shapes. That separation lets supported annotations remain independent of the page's original text and images, as described in Microsoft's PDF annotation specification notes.
2. Match the Tool to Your Intended Mark
Select Pen or Freehand when you want handwritten notes or an irregular outline. Its standard counterpart is an Ink annotation, which represents separate drawing strokes rather than requiring you to redraw the page.
Choose a shape tool for a clean boundary. A rectangle can frame a paragraph, while a circle can identify an item without suggesting that its wording has changed.
Drawing Tools and Their PDF Annotation Types
| Tool | Annotation Type | Best For |
|---|---|---|
| Pen or Freehand | Ink | Handwritten notes, sketches, and quick circles |
| Line | Line | Connecting related items or marking a boundary |
| Arrow | Line with arrowhead styling | Pointing to an exact clause or detail |
| Rectangle | Square | Framing a passage or diagram area |
| Circle or Oval | Circle | Calling attention to an item |
| Polygon, when available | Polygon | Outlining an irregular area |
| Text | Free text | Readable instructions placed on the page |
| Highlight | Text markup | Calling attention to selected wording |
Choose Text when your recipient needs a precise instruction, such as “Check the date against the application.” Handwriting is useful for quick feedback, but a typed explanation is easier to interpret when the message is long.
A Highlight should identify wording, not obscure it. The guide to highlighting text in a PDF document explains that focused workflow.
Use drawing to show where the issue is. Use text to explain what the recipient should do.
After placing a mark, switch to the selection control and try selecting it. If the editor exposes handles or style settings, you can adjust that object. Don't assume every export preserves every annotation as editable data, since the saved result needs verification.
Adjust Pen Size, Color, and Opacity
A thick circle may look clear on a small preview but cover punctuation when you inspect the page closely. Set the pen against the document's text size, not just against the size of your screen.
Select Pen or Freehand first. Then find stroke width, color, and opacity, where those settings are available, before making a short test stroke in an unused margin.
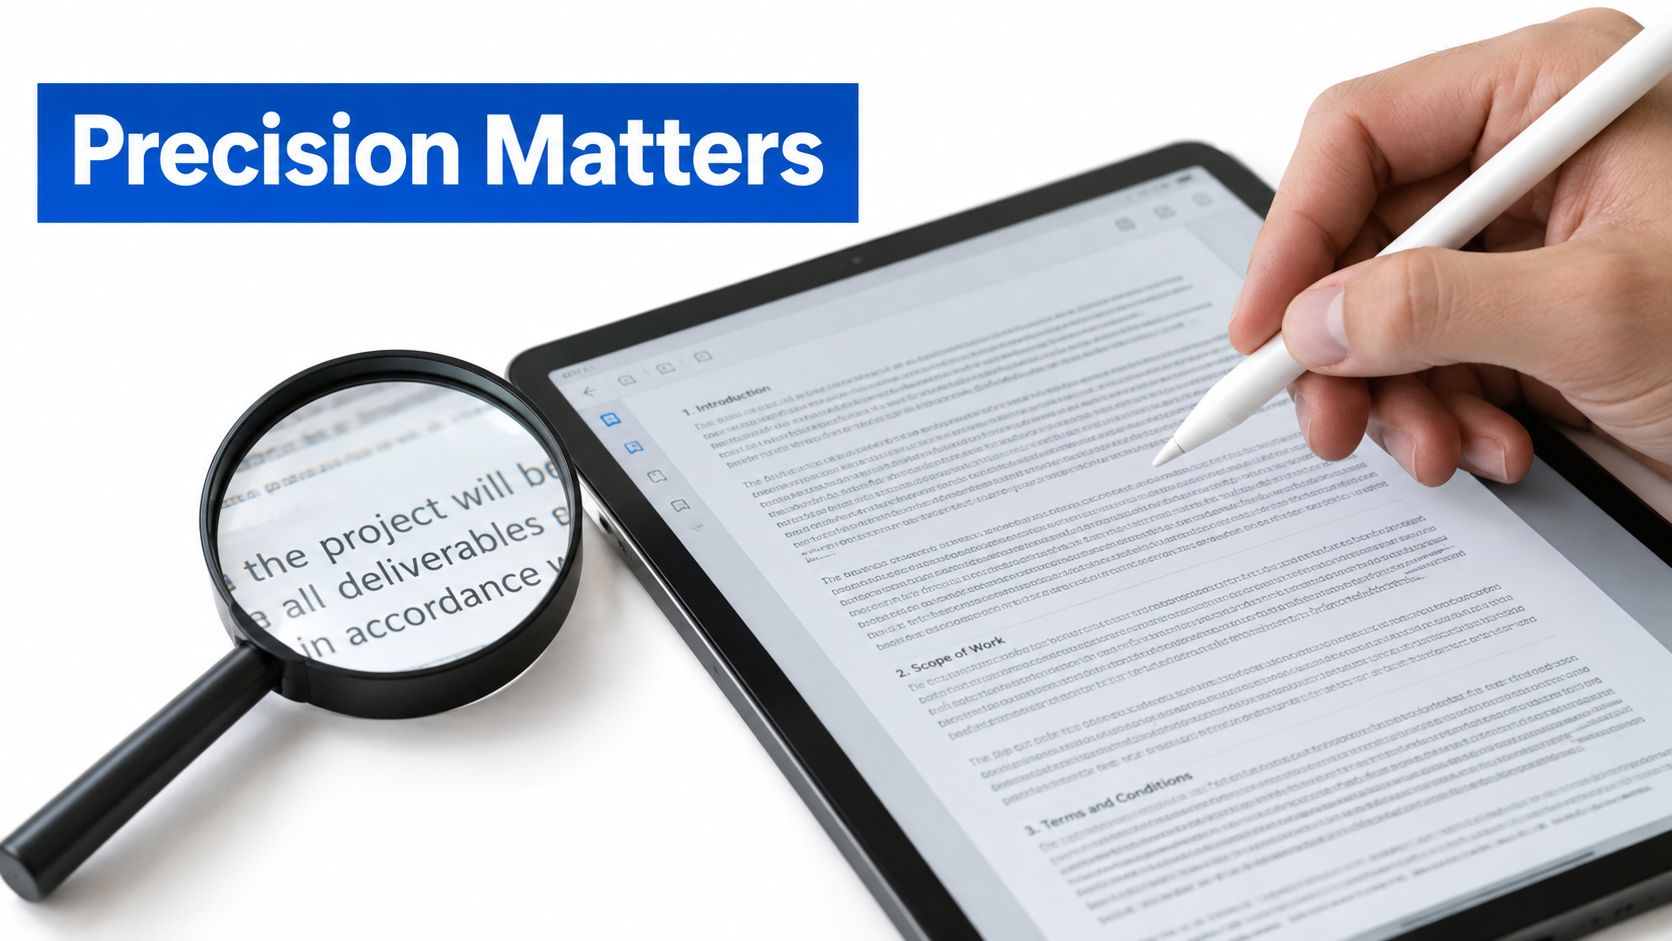
3. Test the Stroke Before Marking Important Text
- Stroke width: Start with a line that's visible without covering letters. Circle around the words rather than drawing through them.
- Color: Choose a color that contrasts with the page and nearby artwork. Pair color with a label or distinct shape when it conveys meaning.
- Opacity: Use a translucent mark when readers need to see content beneath it. Keep handwritten instructions dark enough to read comfortably.
- Scale: For stylus writing, try approximately 200% zoom, then inspect the result at 100%, following the practical workflow accompanying the PDF standard's ink-annotation guidance.
The zoom check isn't a promise that every pen setting will behave identically. It's a way to catch oversized handwriting and strokes that hide small details before you finish the page.
A good annotation should remain understandable when the recipient reads the document at ordinary viewing size.
Check a print preview if the document will be printed. A color distinction that seems obvious on-screen may be less useful in grayscale, so add words such as “Revise” or “Approved” instead of relying only on red and green.
If a test mark is too heavy, select it and change its appearance when the editor permits. Otherwise, undo it and redraw with a narrower stroke. Make those corrections before repeating the same setting throughout the document.
Real Workflows for Drawing on a PDF
The following examples are practice scenarios, not customer case studies. Each combines a visual pointer with enough written context for another person to act on it.
4. Combine Drawing and Written Feedback
A teacher reviewing an essay uses the circle tool around a sentence with an unclear subject. Beside it, a text note says, “Who performs this action?” The circle identifies the location; the free-text annotation provides the teaching point.
For repeated errors, the teacher can use brief labels and a separate explanation rather than covering every line with handwriting. The guide to adding notes to a PDF is useful when feedback needs more room than the margin provides.
A lawyer reviewing a contract places an arrow beside a clause that needs discussion and highlights the definition connected to it. A written note explains the proposed change. These are review marks, not amendments to the contract's underlying wording.
A student preparing a group submission uses the pen for a quick margin sketch and a text box for the final correction. Before drawing a signature on the cover page, the student checks the submission requirements. A handwritten signature image isn't the same object as a certificate-based digital signature.
For a construction-plan review, consult RBA Home Plans on working drawings for related context. Use arrows to identify proposed measurement changes, then type the intended revision rather than making someone infer it from a sketch.
Across these scenarios, keep the original document and the reviewed copy separately named. The recipient should be able to distinguish your feedback from the author's original content.
When Drawing Is Not Redaction
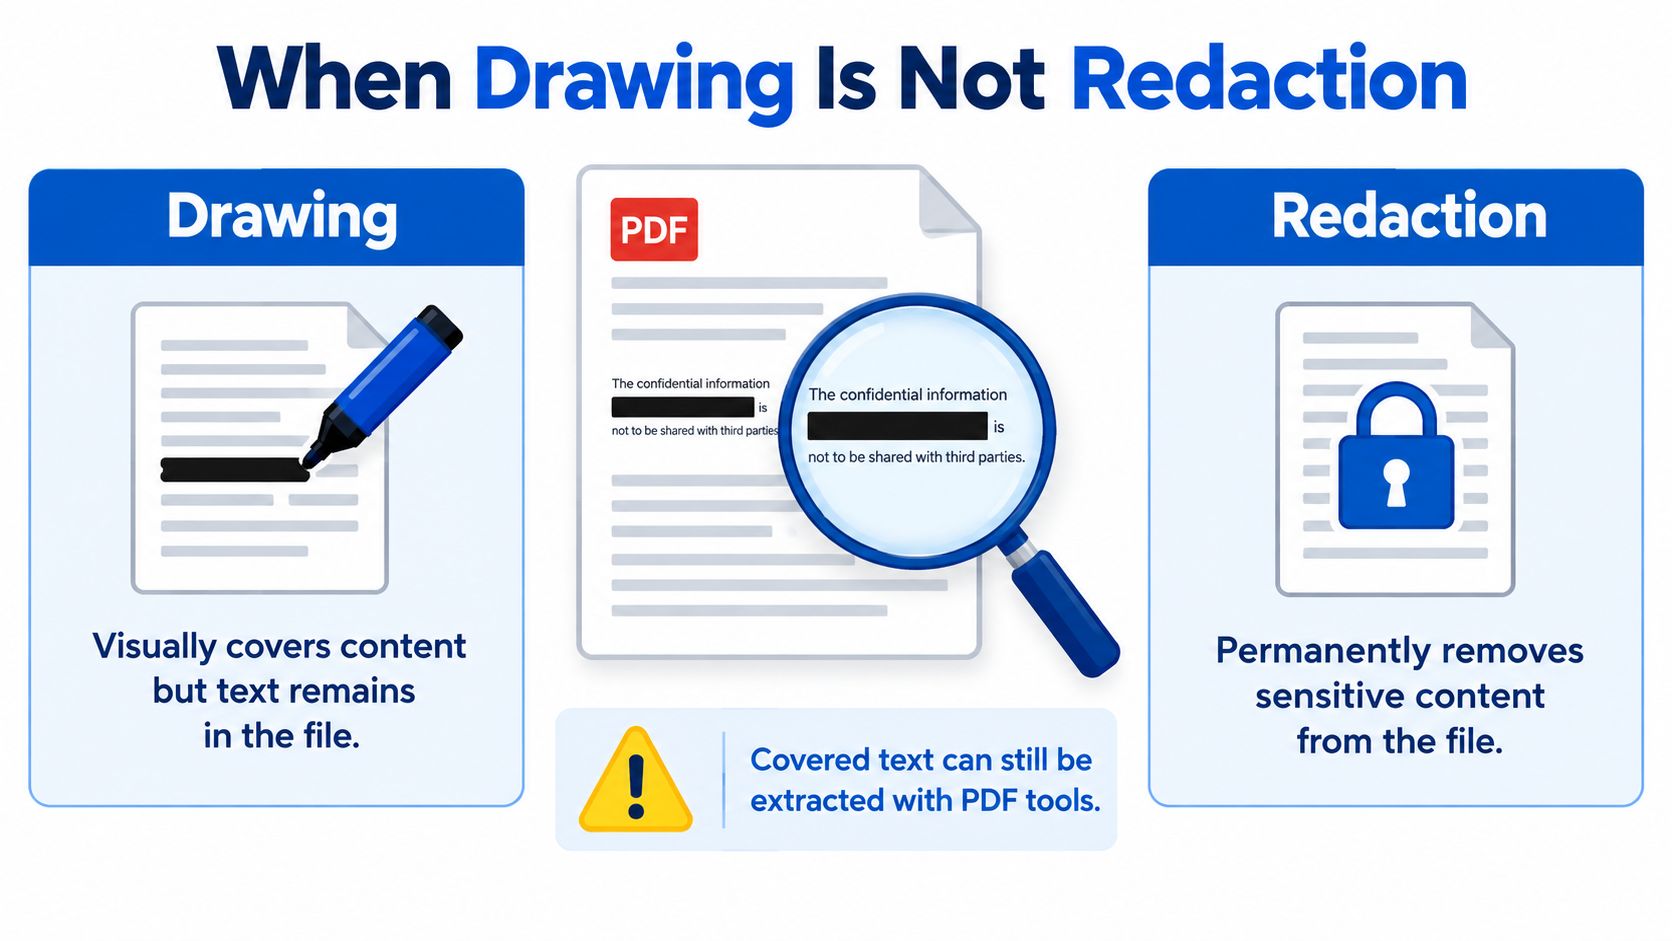
Drawing a black box over text doesn't securely remove that text. The rectangle may cover what you see while leaving the content beneath it available for copying, searching, or extraction.
This isn't just a theoretical concern. IT Brew's reporting on PDF redaction failures describes incidents in which apparently concealed information remained recoverable. Treat an opaque shape as an annotation, not as a confidentiality tool.
5. Remove Sensitive Content With Redaction
Use a dedicated Redact PDF operation for personal identifiers, confidential contract details, medical information, or financial records. Follow the guide to redacting text in a PDF rather than substituting the rectangle tool.
- Apply the removal: Don't stop after marking the area for redaction. Complete the operation that permanently removes the selected content.
- Inspect hidden material: Review metadata, comments, attachments, form fields, and other document components that might contain the same information.
- Test the saved copy: Search for the sensitive wording and try selecting or copying the affected area in another viewer.
Those tests help catch mistakes, but a failed search alone isn't proof that all sensitive material is gone. Scanned content, attachments, and hidden document components need their own inspection.
Security rule: If the goal is confidentiality, remove the information. Don't merely change how it looks.
Keep the unredacted original in an appropriately restricted location. Share only the verified redacted copy, and check that you haven't accidentally attached the original instead.
Drawing on PDFs From a Phone or Tablet
On a touchscreen, the challenge is separating page movement from drawing. A finger drag may scroll the document until you activate the pen, then leave a stroke once drawing mode is active.
Start with a practice mark in the margin. If your finger keeps moving the page, check that Pen or Freehand is selected before trying again.
6. Set Up Your Touchscreen Workspace
- Choose suitable input: A compatible stylus can make small handwritten marks easier to place. Check your device's support rather than assuming every stylus offers pressure sensitivity or palm rejection.
- Rotate when helpful: Landscape orientation gives you more horizontal room for margin notes. Keep the page orientation itself unchanged unless it needs correction.
- Separate movement from marking: Use the selection or hand control to move around the page, then return to the drawing tool.
- Undo deliberately: Use the editor's visible Undo control. Only rely on a system gesture if you know it works in that browser and editing mode.
On iOS or Android, open the downloaded PDF through the browser's file picker. After editing, use the editor's save or download control, then locate the output in your device's download or file-management app.
For signature-specific work, the guide to signing a PDF on an iPad provides a more focused starting point.
7. Check the Export Outside the Browser
Open the saved copy in a different PDF viewer and inspect the marked pages. Look for missing strokes, shifted text boxes, and marks that appear differently from the editing preview.
A mobile browser is convenient for short reviews without installing another application. A dedicated app may suit longer handwriting sessions or device-specific pen controls. Choose based on the actual tools you need, not on whether the device has a touchscreen.
Saving, Verifying, and Frequently Asked Questions
Save the annotated document under a distinct filename, then inspect the exported file rather than relying on the editing preview. Check the pages you changed and, when relevant, the printed result.
Accessibility needs a separate check. A visible arrow or handwritten instruction may not convey its meaning to someone using assistive technology; research evaluating PDF accessibility considers reading order, semantic tagging, alternative text, and other dimensions beyond appearance.
8. Complete the Final Review
- Explain critical marks: Add a text equivalent for instructions conveyed only by a drawing.
- Check structure: Use an accessibility checker to examine reading order and annotation handling where available.
- Inspect the output: Confirm that required marks appear and sensitive information has been properly handled.
Can I Draw on a PDF for Free?
Yes. Every tool in the toolkit is 100% free, with no watermark and nothing to install.
Will My Drawings Stay Editable?
They can if the export preserves annotations. Reopen the file and test selection before relying on later editing.
Does Drawing Change My Original File?
Keep your original separately and save a new annotated copy. Don't assume an overwrite prompt preserves an earlier version.
How Do I Share the File Safely?
Share the verified output, confirm the recipients, and use true redaction when confidentiality requires content removal.
Is AI-Assisted Markup Available?
AI tools are coming soon. Use the available drawing, text, shape, and annotation tools for current work.
PDFKing offers browser-based tools for adding drawings, shapes, highlights, and notes to your PDF. Visit PDFKing, open Edit PDF, and try a practice mark before saving and checking your annotated copy.